What you get
- Document search, reading a document and “who knows what” from Slackbot.
- Tools in Slackbot: Whoami, Search, Get document and Who knows, and with the
proposescope also proposing a note (propose_note). - A document uploaded to Izumi (upload, note) gets a link to its own page in Izumi. A document from Google Drive keeps the link to the original source.
Who does what
Before you start
- Izumi 0.5.2 or newer with OAuth turned on (the administrator sets this up on the server, see the Installation tab).
- An Izumi administrator with access to the server.
- A Slack workspace where you can create apps. The Free plan is enough. Slackbot MCP is in Preview.
- A Slack account that may install an app: a workspace owner or admin, or with an admin’s approval.
- The Izumi address. In this guide it is
https://izumi.akiaconsulting.com.
Step 1: register Slack as a client in Izumi (Izumi admin)
Slack cannot register itself in Izumi (automatic registration does not work, see “Limits”). So the administrator makes a public client by hand, once. On the server, in the Izumi folder:- The command prints a
client_id. Save it, you need it in step 3. - This is a public client: there is no
client secret. PKCE protects it. - The redirect address must be exactly
https://oauth2.slack.com/external/auth/callback. - To check:
./tb admin oauth client listshows the client../tb admin oauth client remove <client_id>removes it.
Steps 2 to 5 (Slack admin)
Step 2: create a Slack app
Recommended: a separate app only for Izumi, so it does not share a bot token with other tools.1
Open Create New App
Open 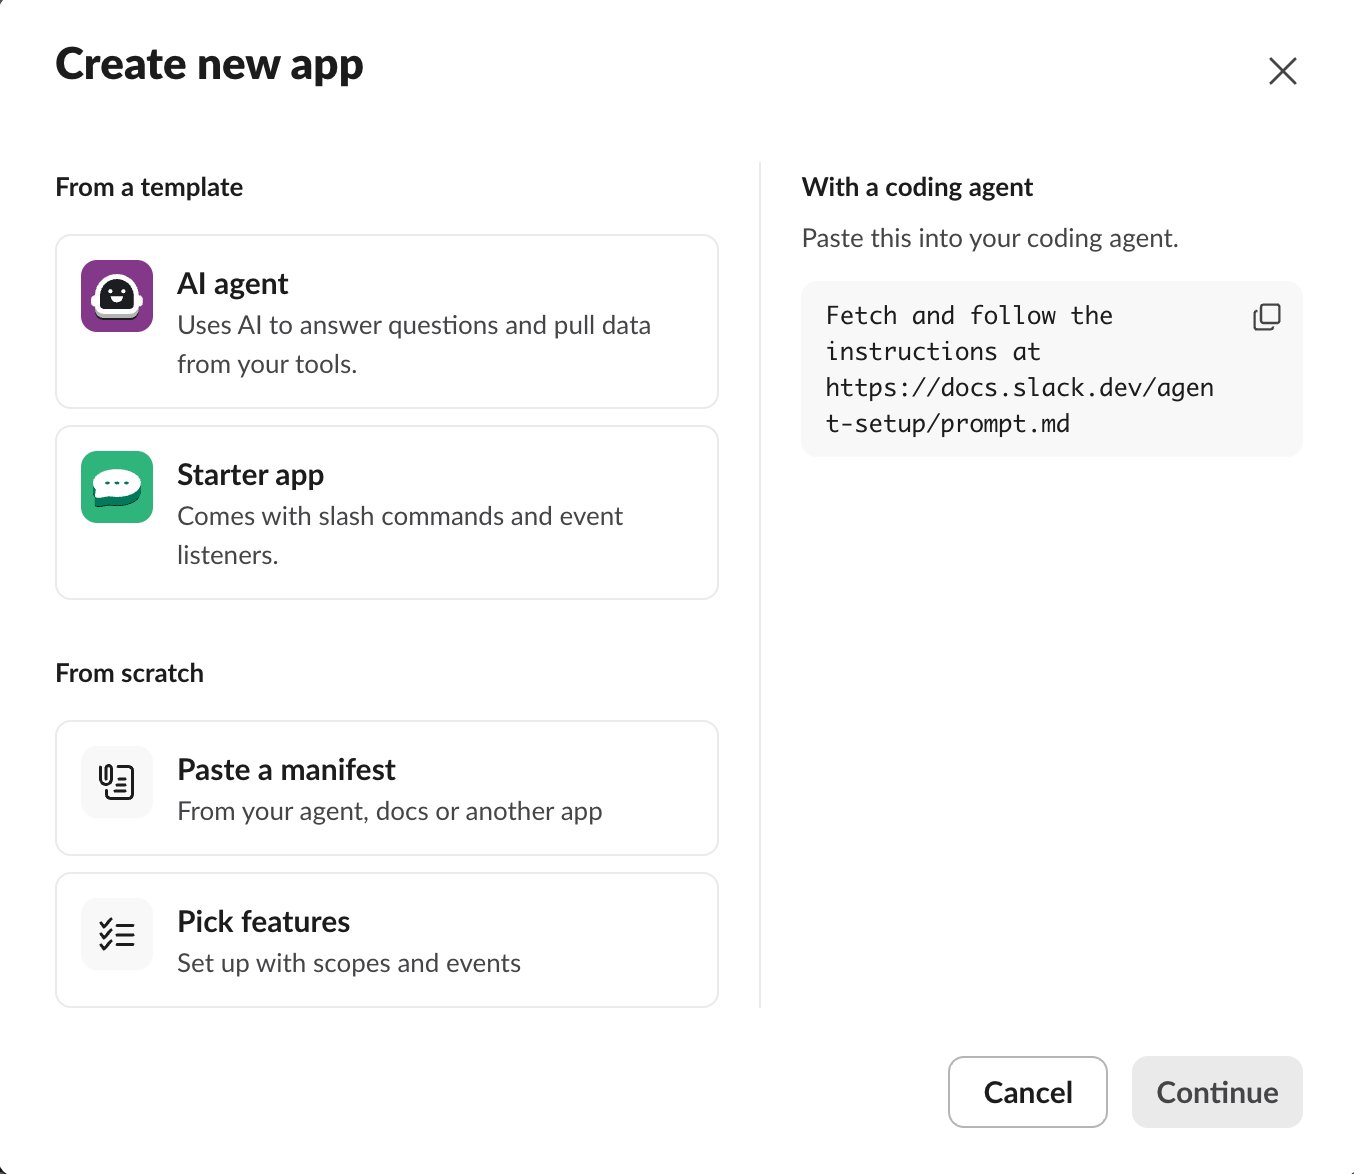
https://api.slack.com/apps and click Create New App. In the window, under From scratch, choose Pick features.2
Name and workspace
Enter a name (for example 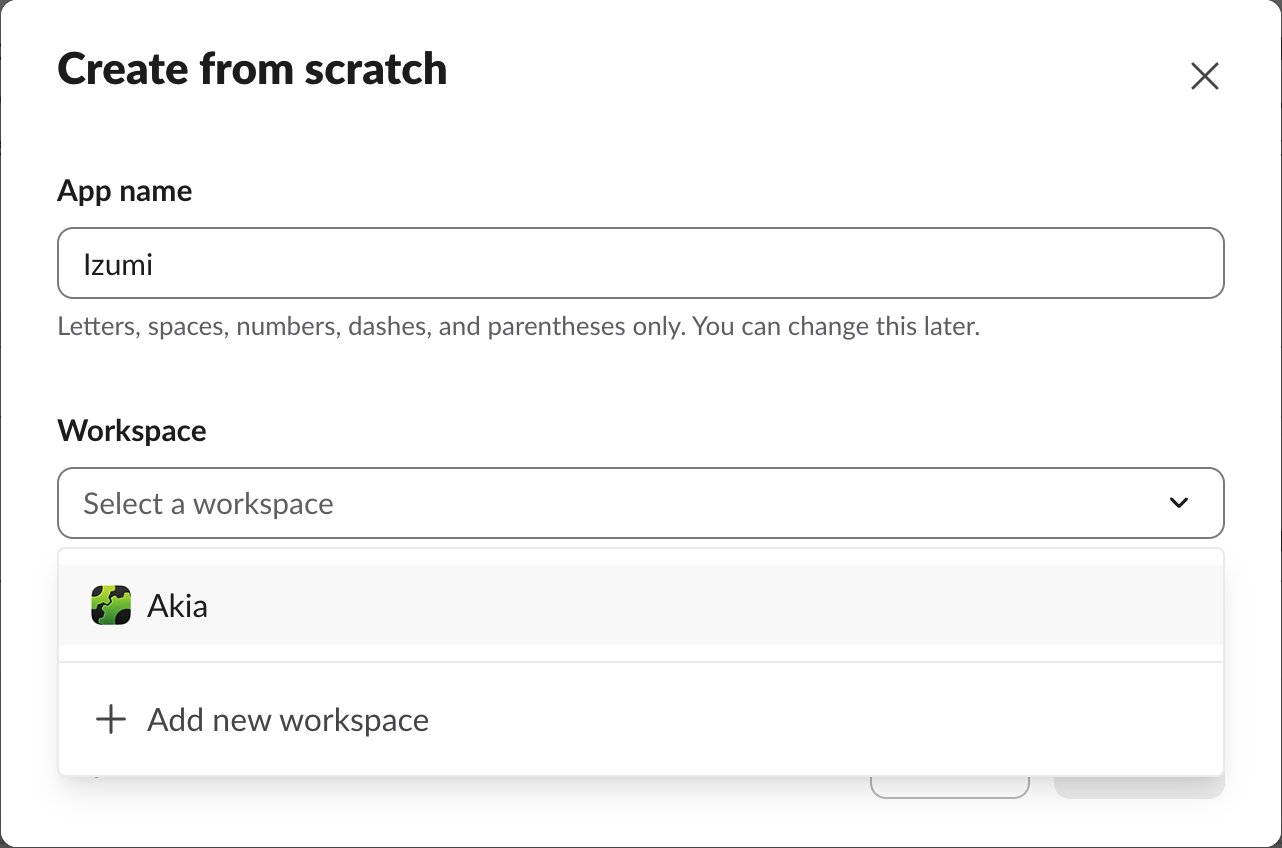
Izumi), choose the workspace and click Continue.3
Add the scope mcp:connect
In the step “What it can do in Slack” type 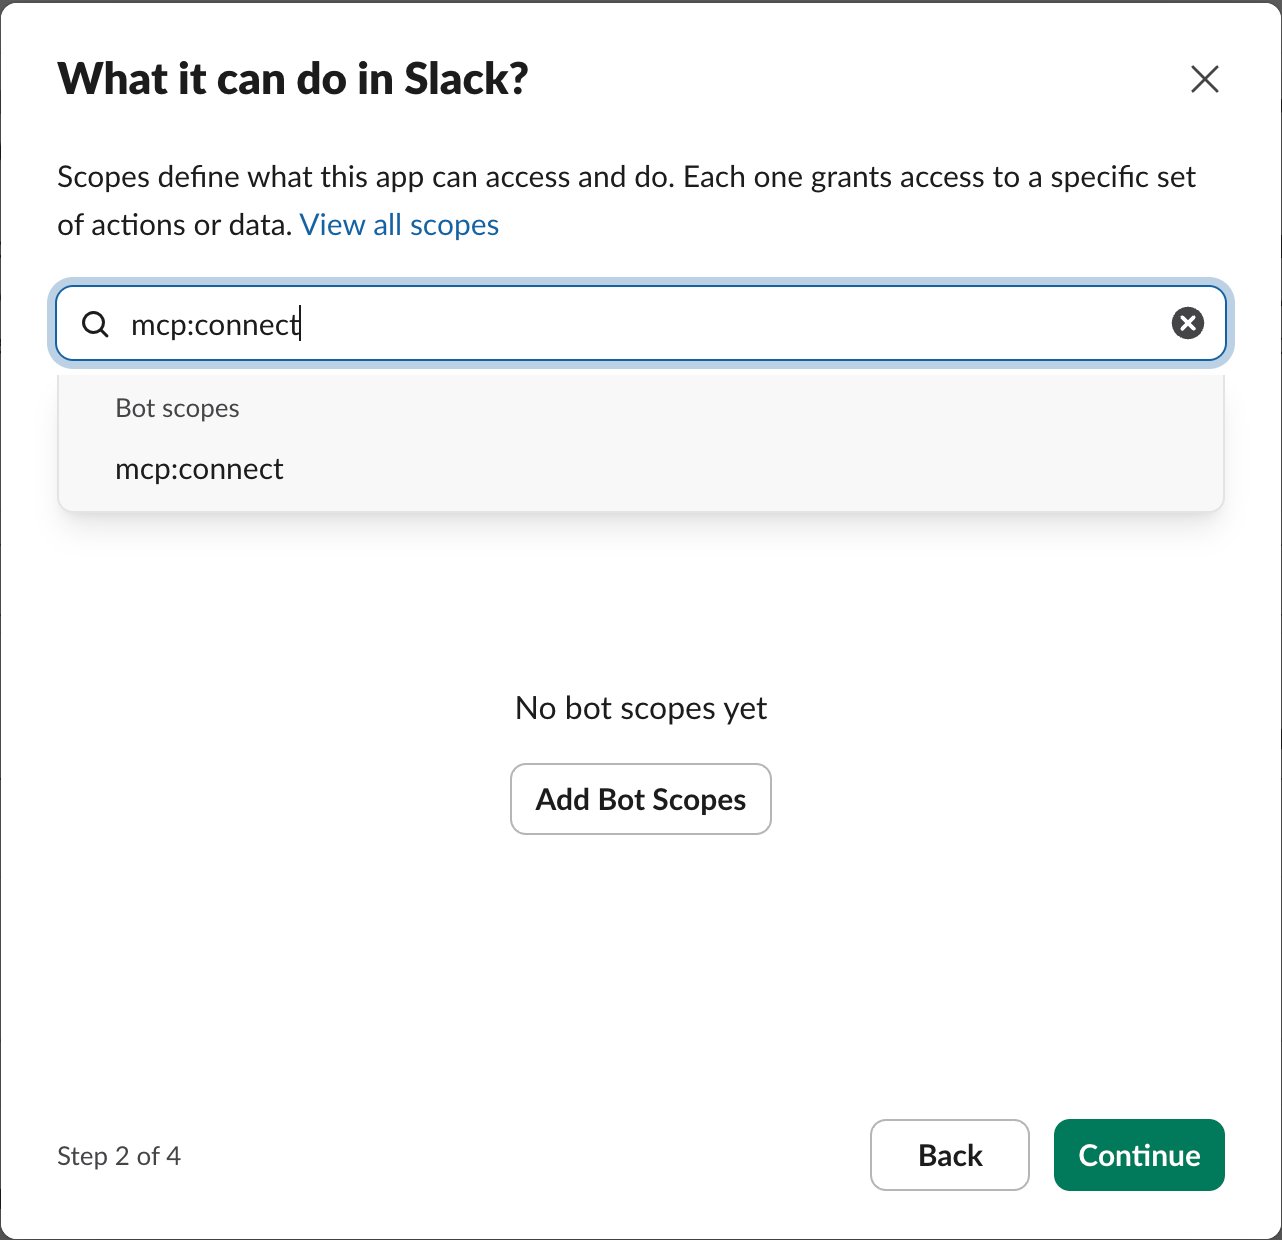
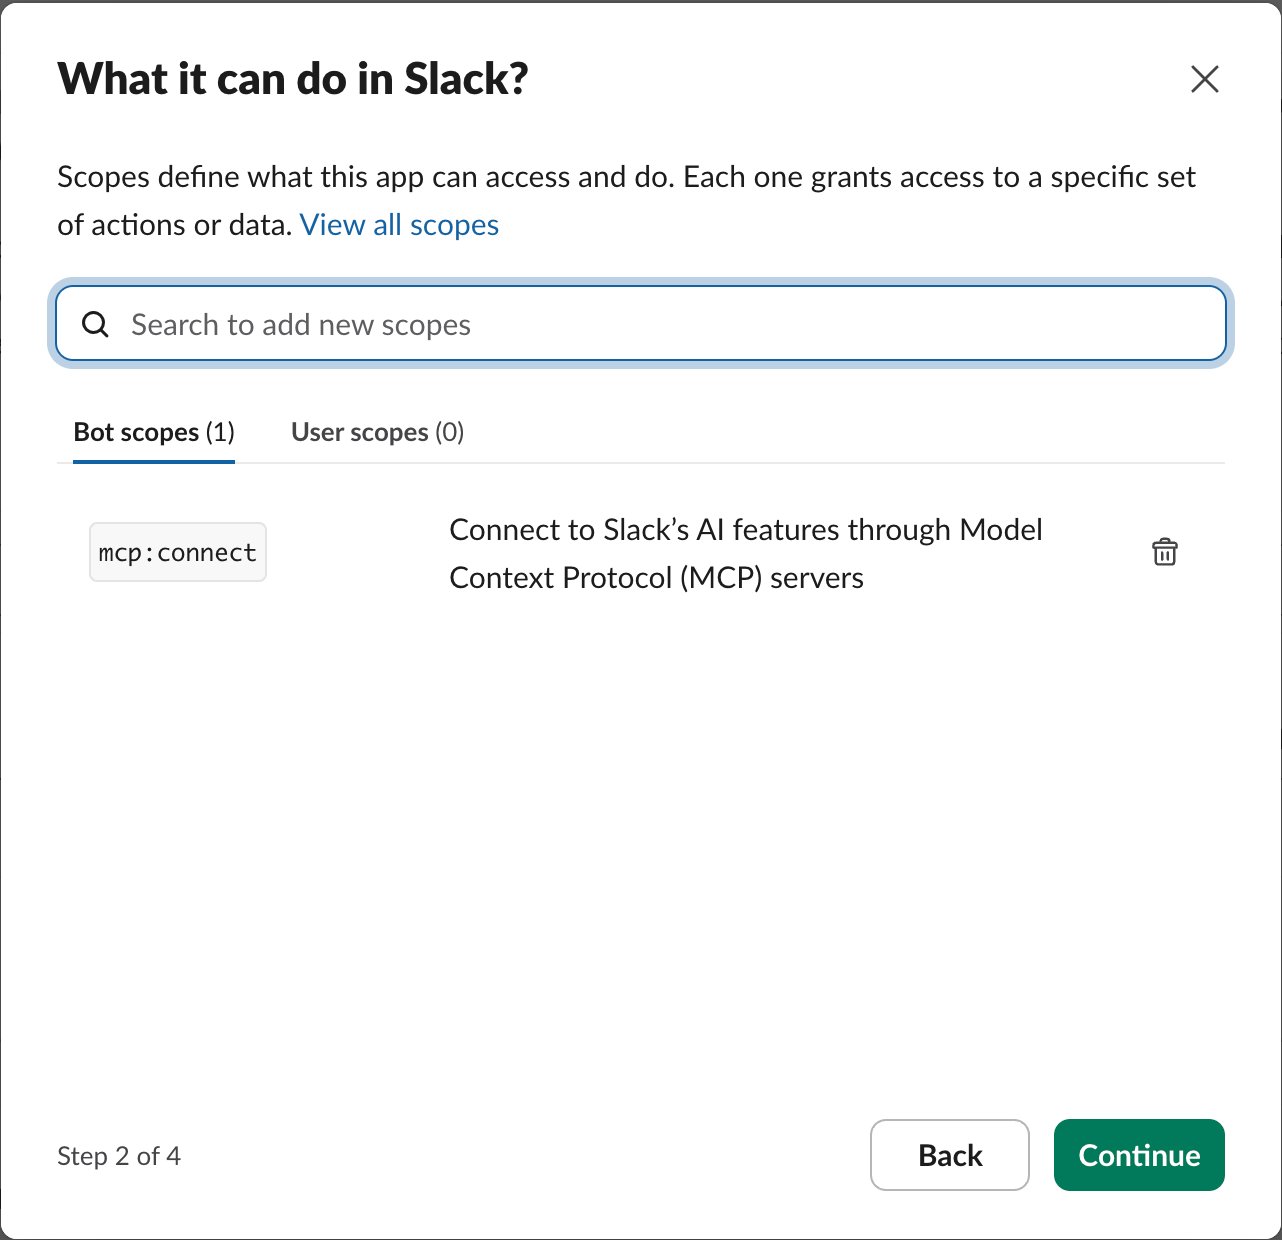
mcp:connect in the search and choose it as a bot scope. It is the only scope you need.4
Finish creating
In the step “What it can respond to” you add nothing, click Continue. The review says What it can do in Slack (1). Click Create and Install.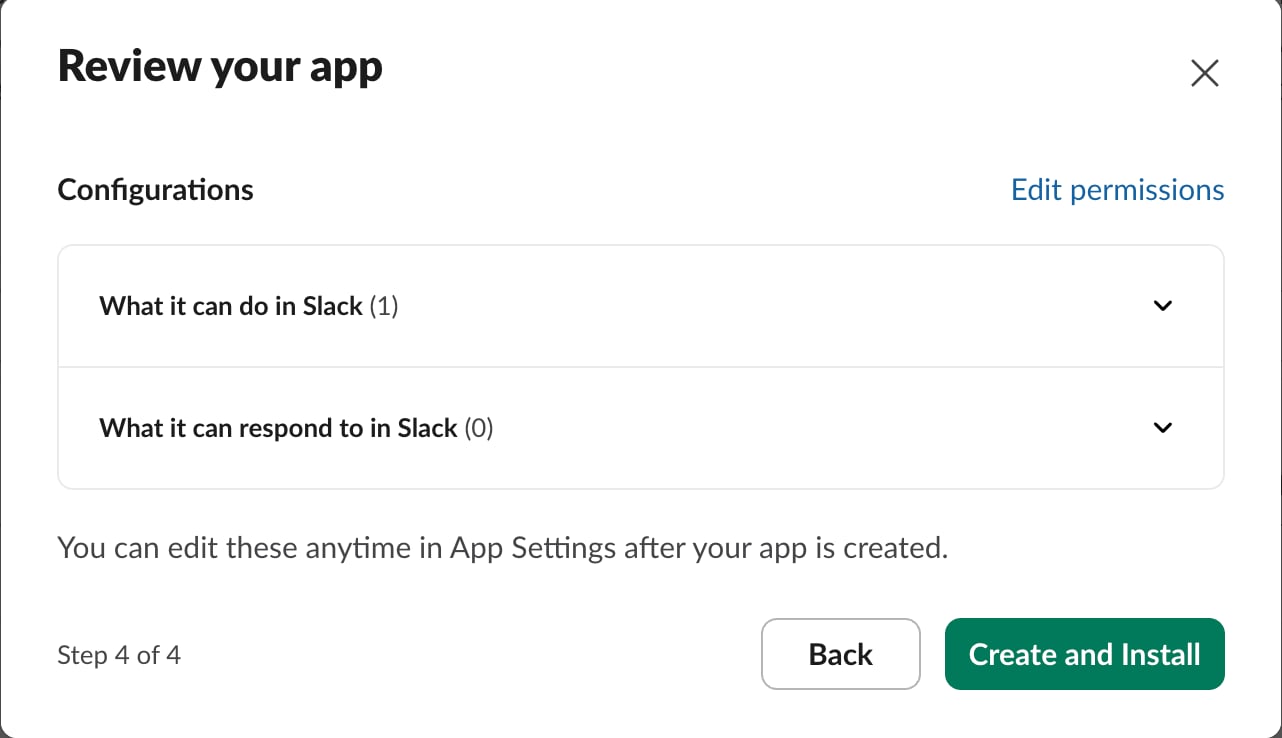
https://api.slack.com/apps. The app was probably already created.Step 3: add Izumi as an MCP server in the app
1
Open MCP Servers
In the app open MCP Servers in the left menu and click Get Started (or Add MCP Server if one exists already).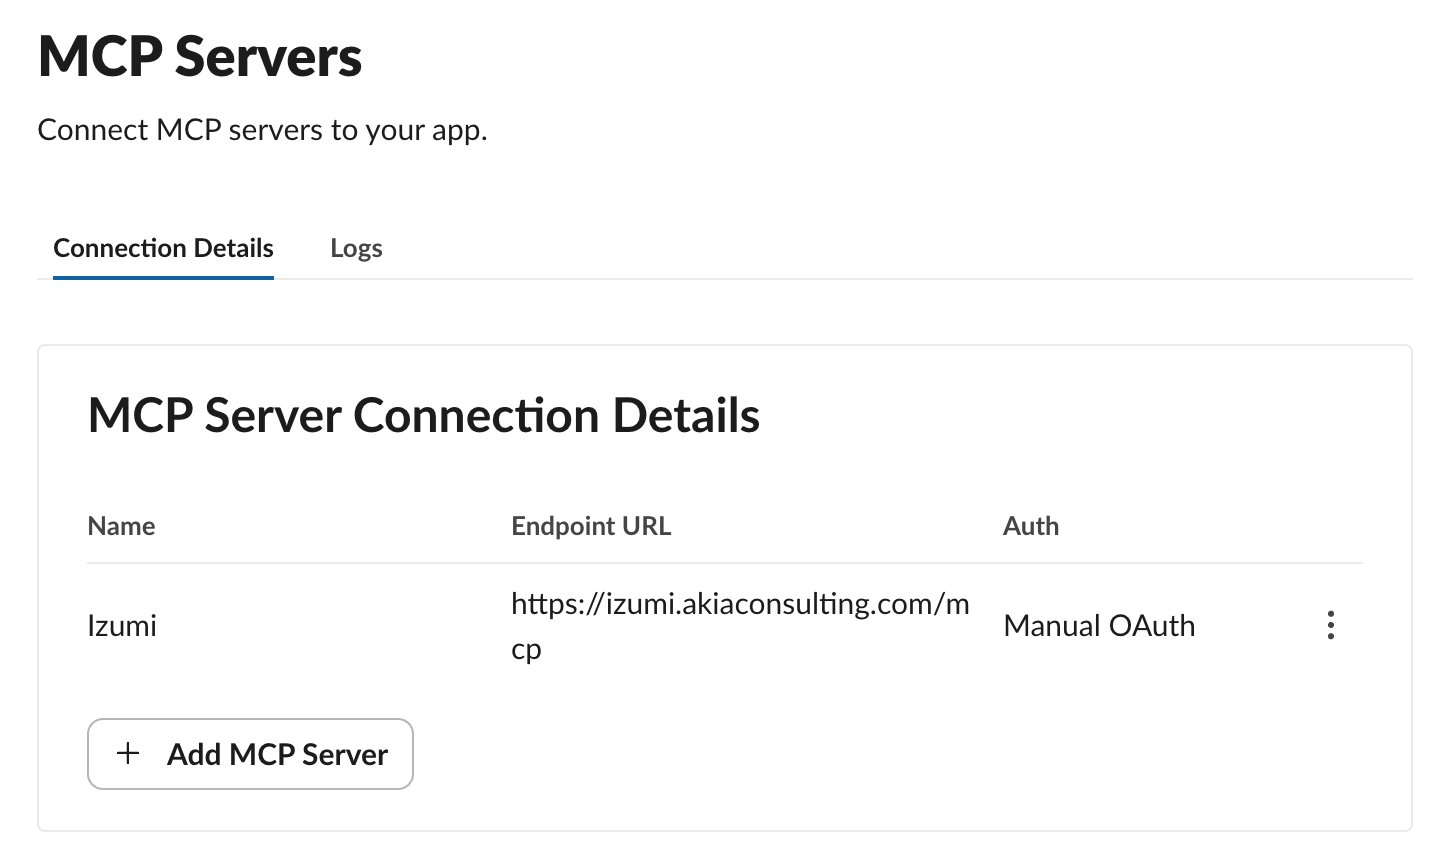
2
Fill in the form
Slack adds the bot scope 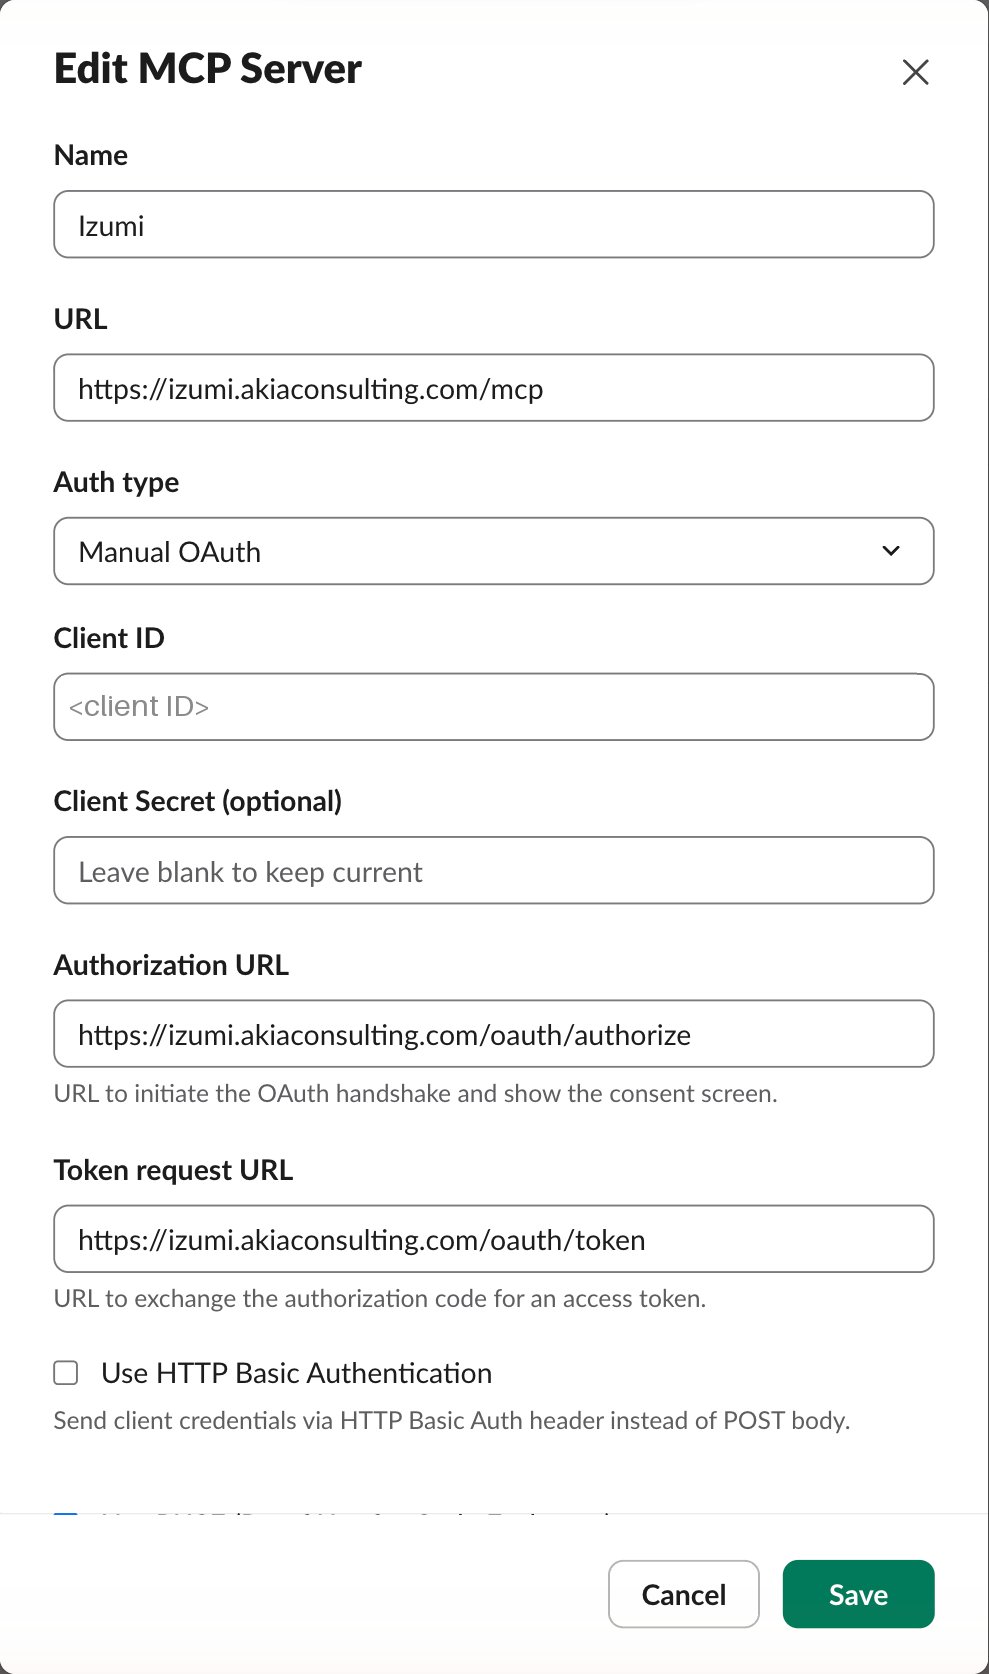
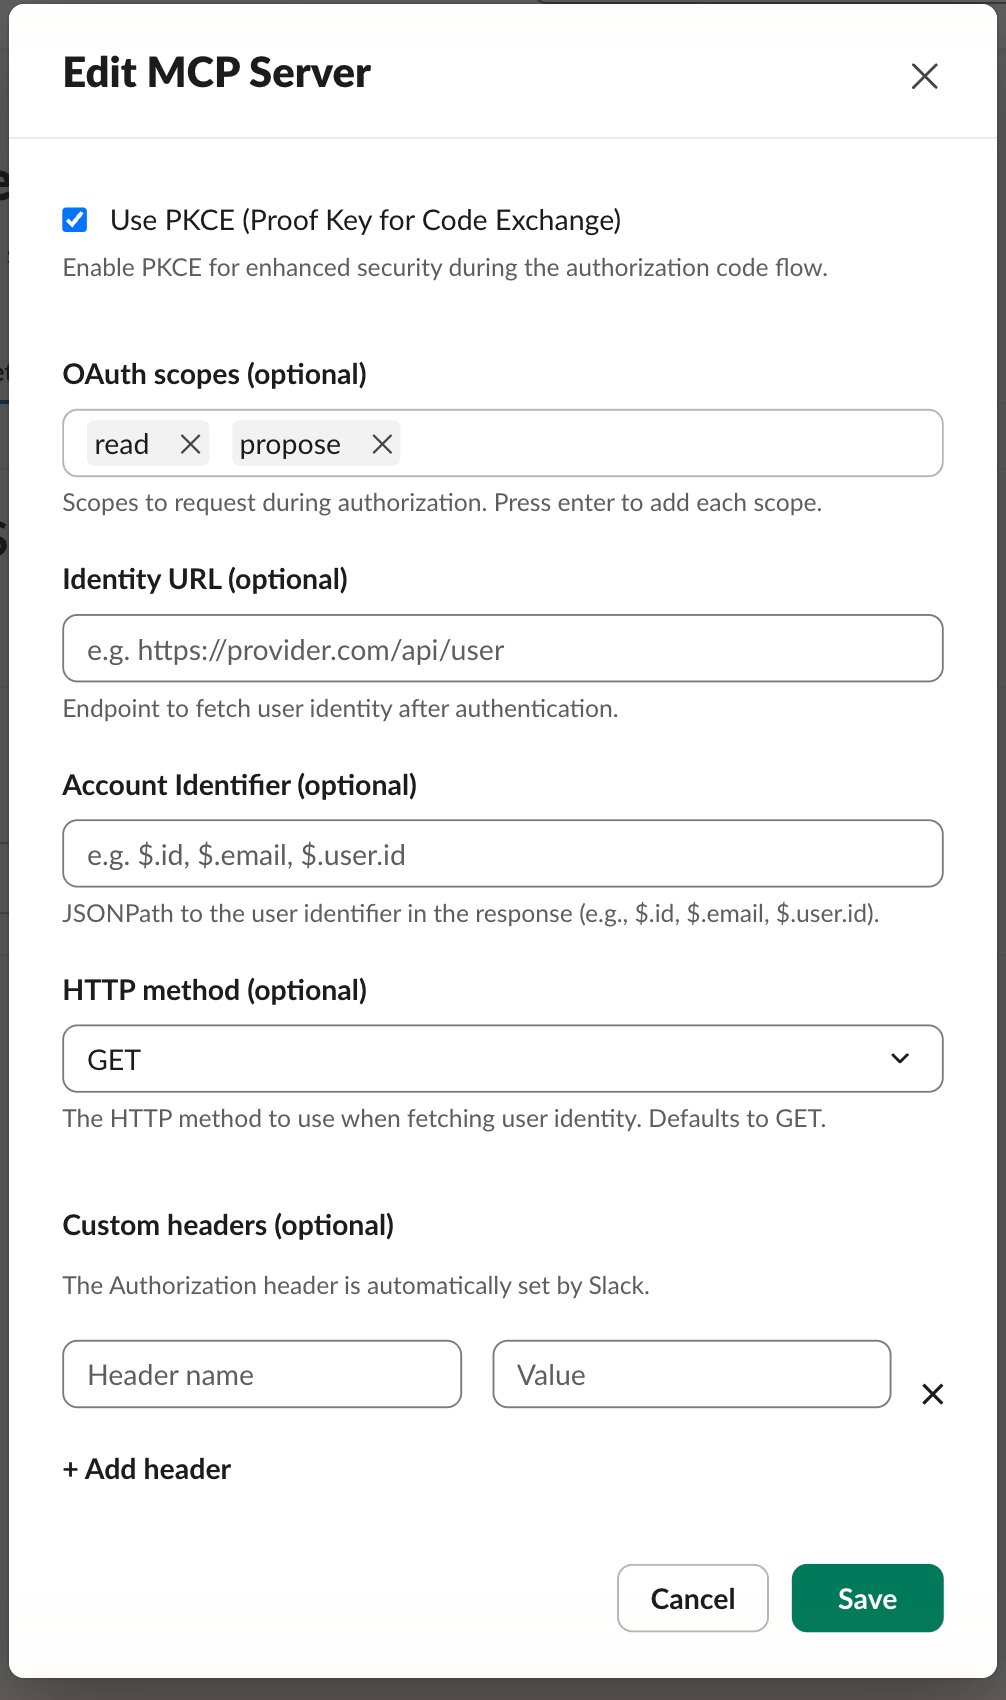
mcp:connect automatically.read is reading (search, documents). propose lets the app propose notes for review. If you do not need propose, keep only read.3
Save
Click Save. A yellow bar “reinstall your app” appears. That is the next step.
Step 4: (re)install the app in the workspace
1
Reinstall
Click reinstall your app in the yellow bar, or open Install App and click Reinstall to (the workspace name).
2
Allow
Slack shows “Allow Izumi to access Slack” with the message “Perform actions in your workspace”. Click Allow. After that Izumi appears in Slack under Apps in the left menu.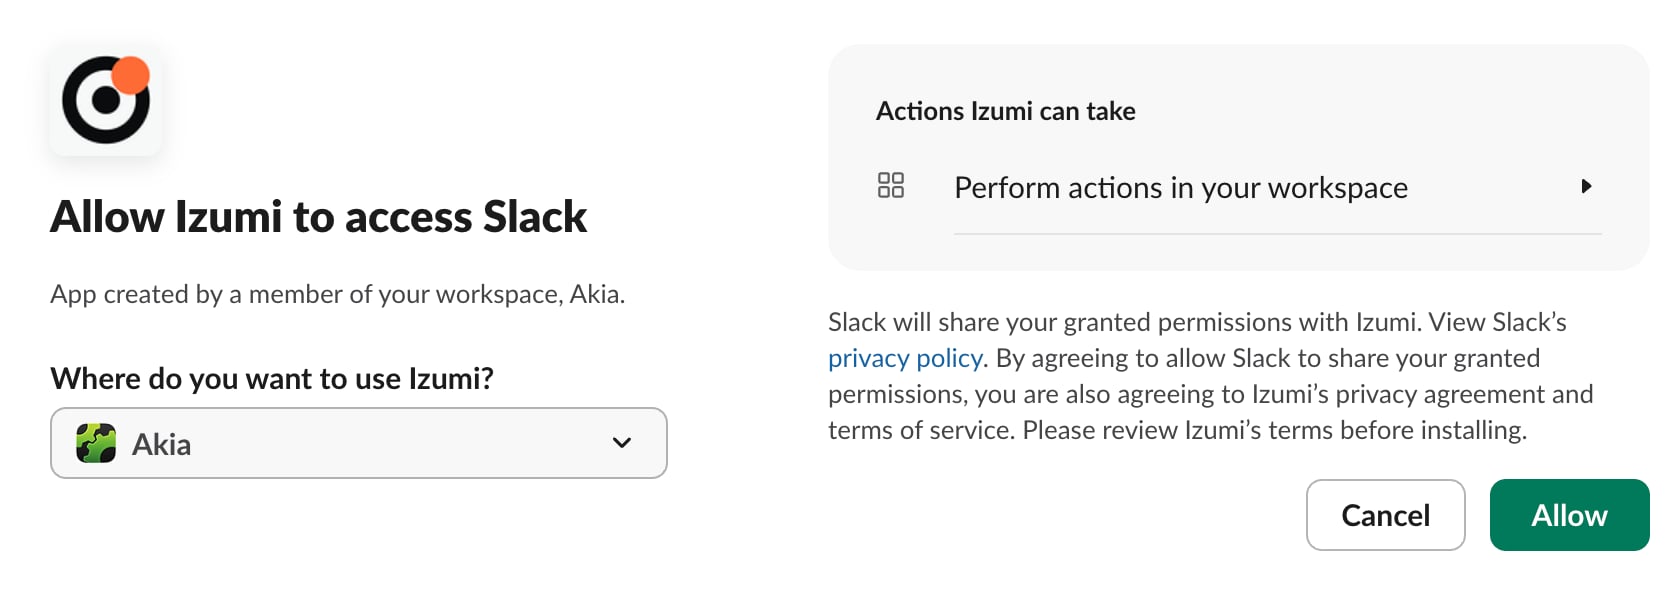
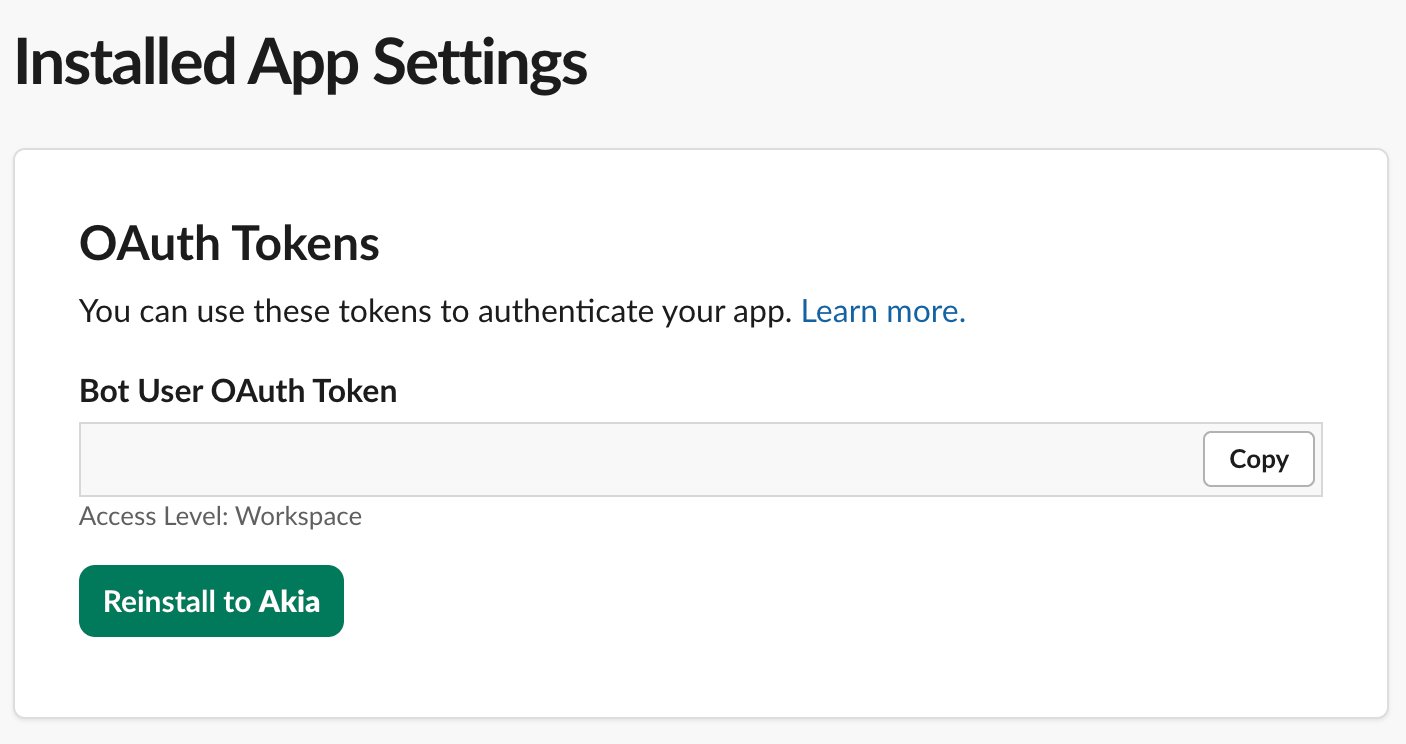
xoxb). It is a secret: do not share it and do not put it in images or guides. In the picture the token is covered.
Step 5: app appearance (optional)
In Basic Information, section Display Information: the name, a short description (for example “Izumi team knowledge base for Slackbot”), an icon (the orbit mark, PNG 512 px or larger) and a background color. The icon shows in Slackbot when it asks for permission.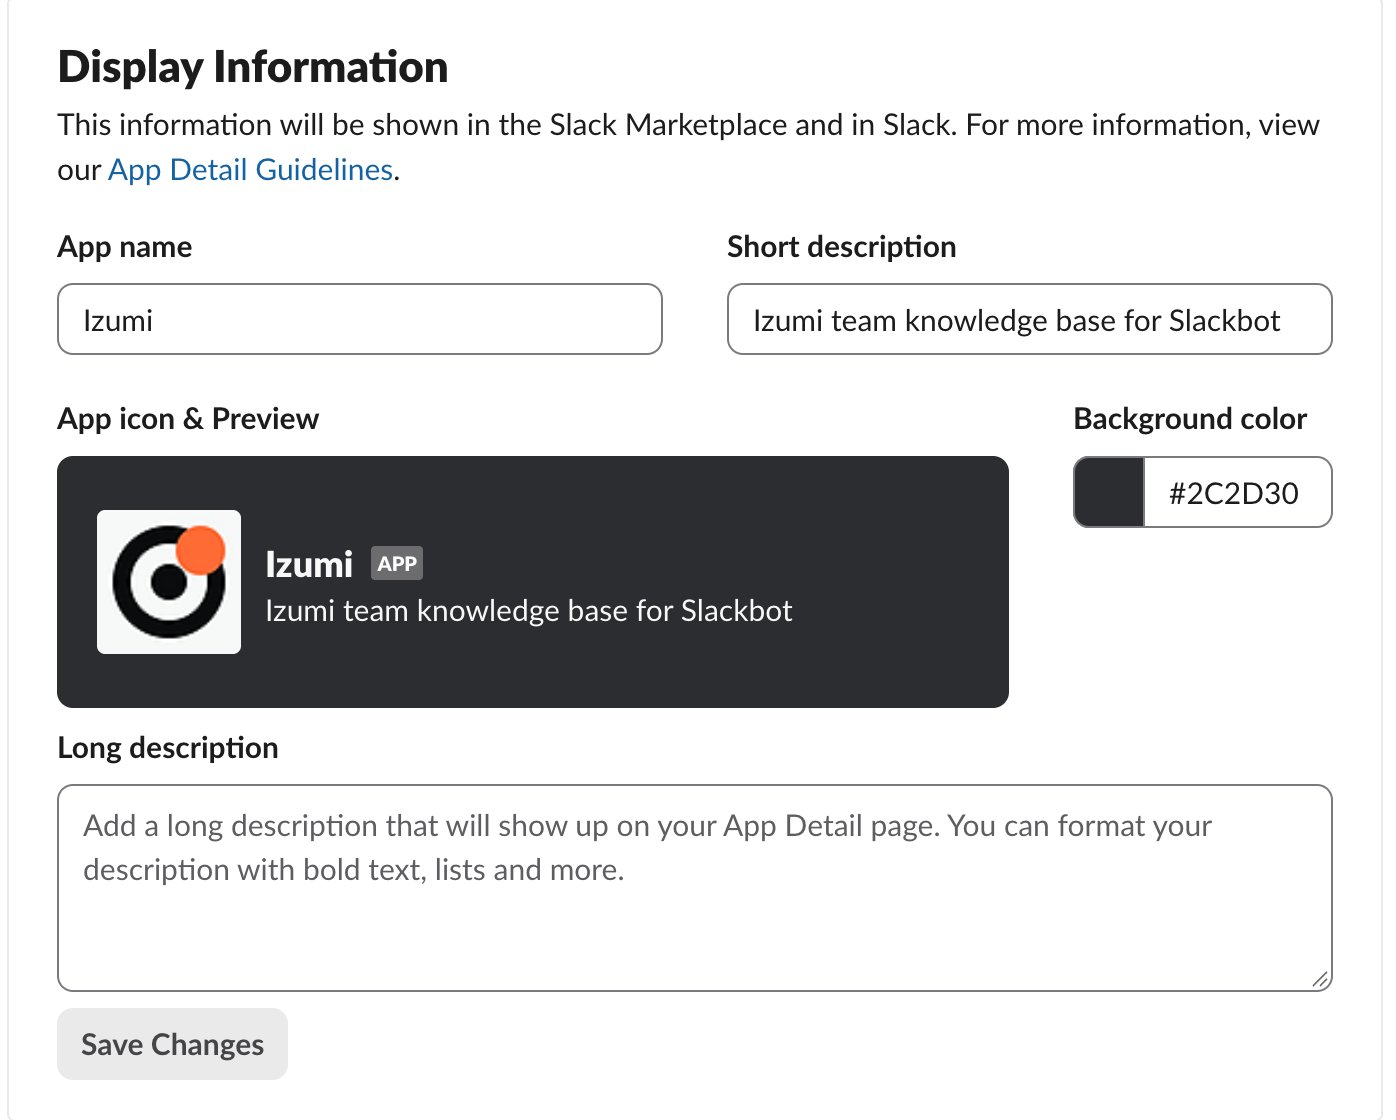
Step 6: every user connects their Izumi account
Every person does this once.1
Ask Slackbot something about Izumi
In the Slackbot panel ask a question that mentions Izumi, for example: “Via Izumi: who am I and which companies do I have access to?”
2
Click Connect
Slackbot shows the card “Connect your Izumi account to continue” with Don’t ask again, Not now and Connect. Click Connect.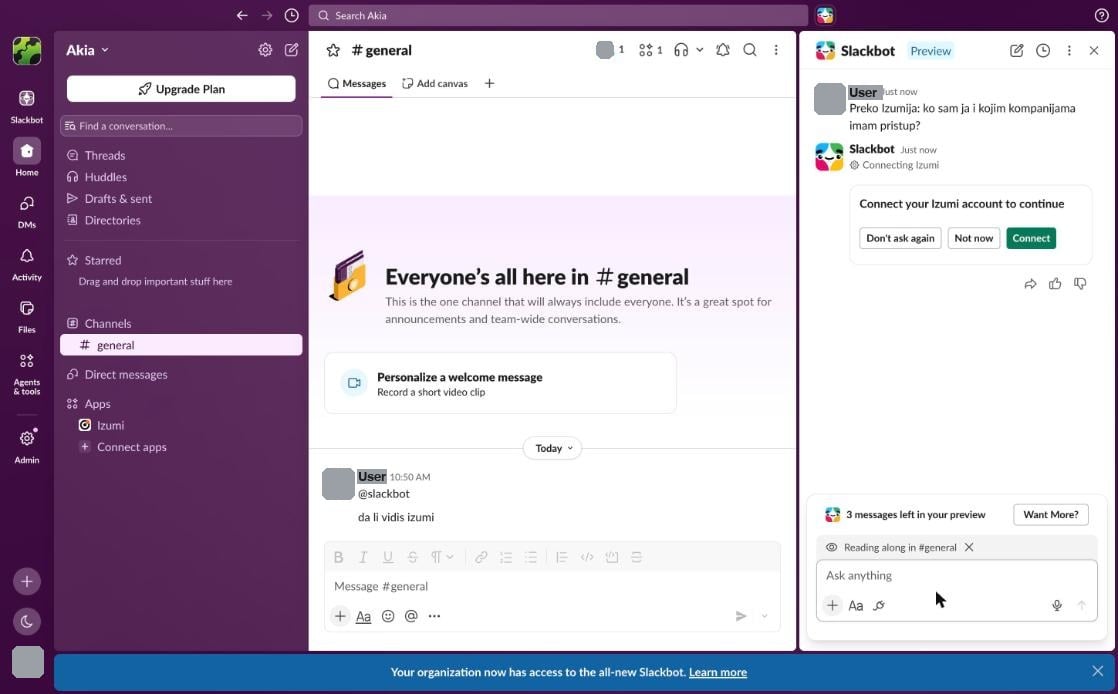
3
Continue to Izumi
A new tab opens: “You are about to connect to an external service”, with your Slack account. Click Continue to Izumi.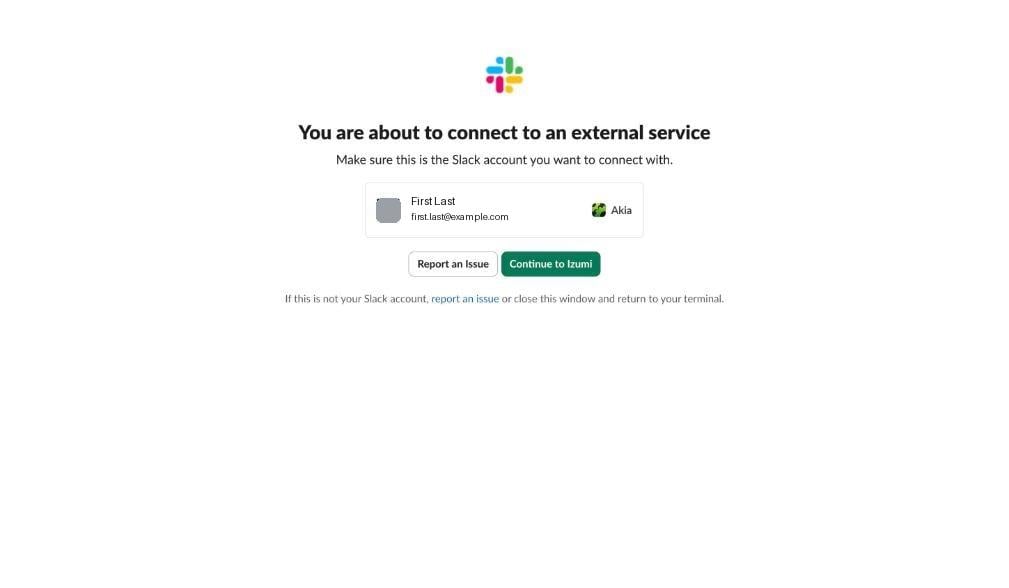
4
Sign in to Izumi
If you are not signed in, Izumi shows the sign-in first. Sign in with the account you usually use.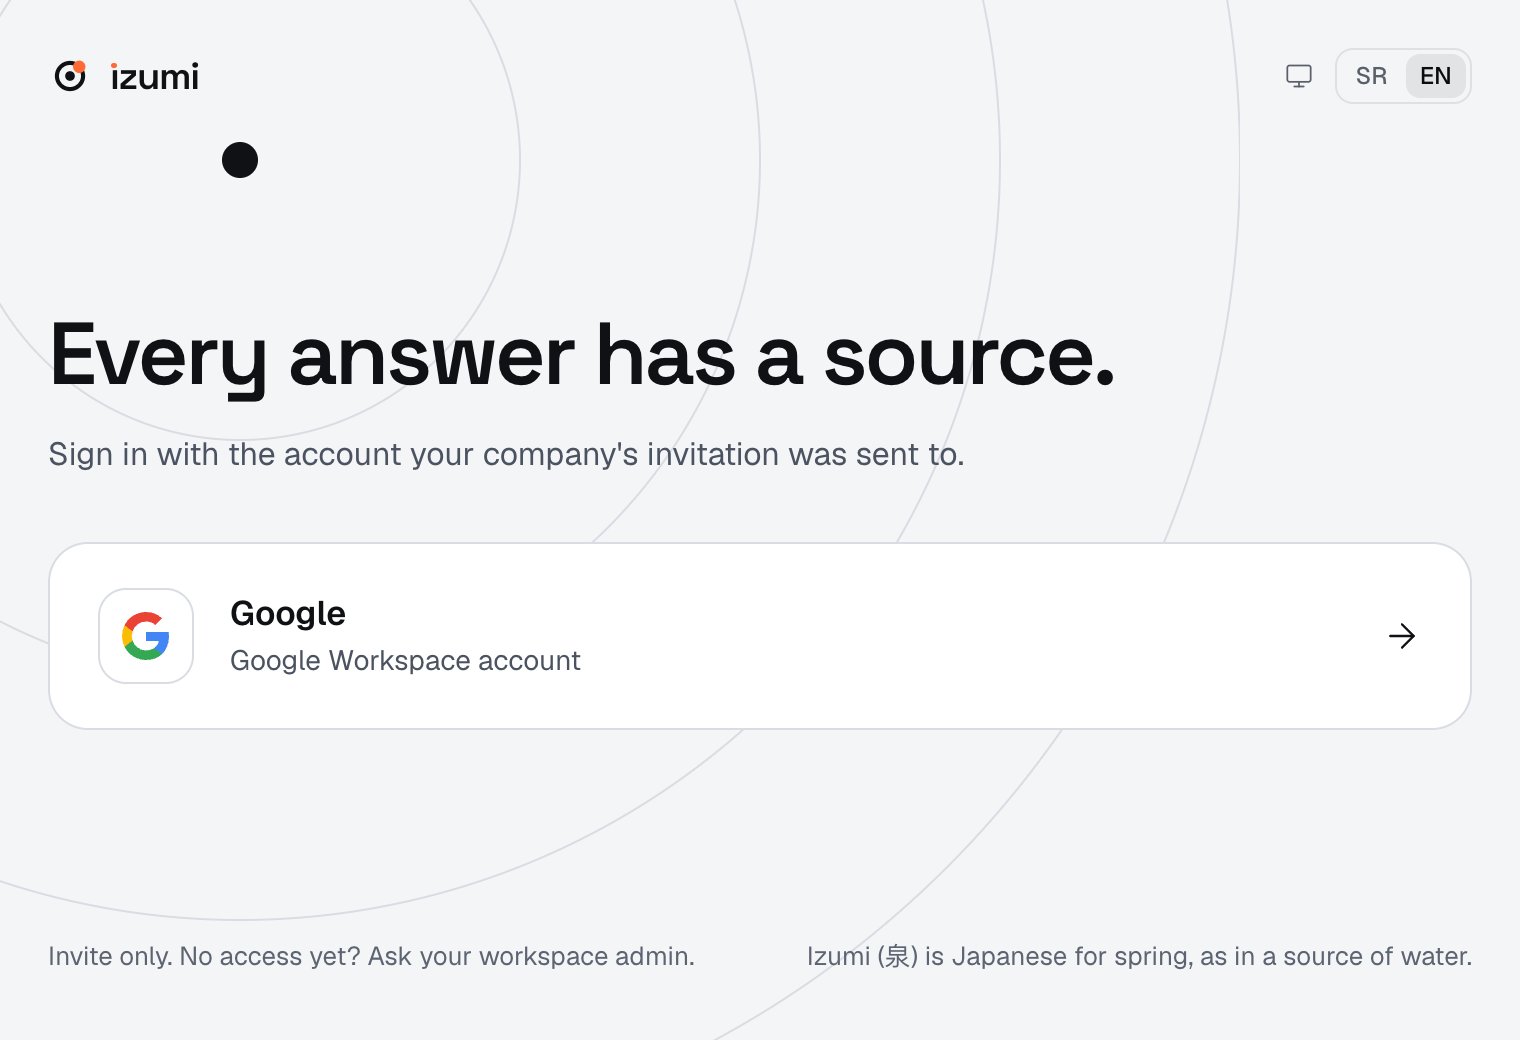
5
Approve the connection
Izumi shows the page “Connect (client name) to Izumi”. The name is the one the administrator gave the client in step 1.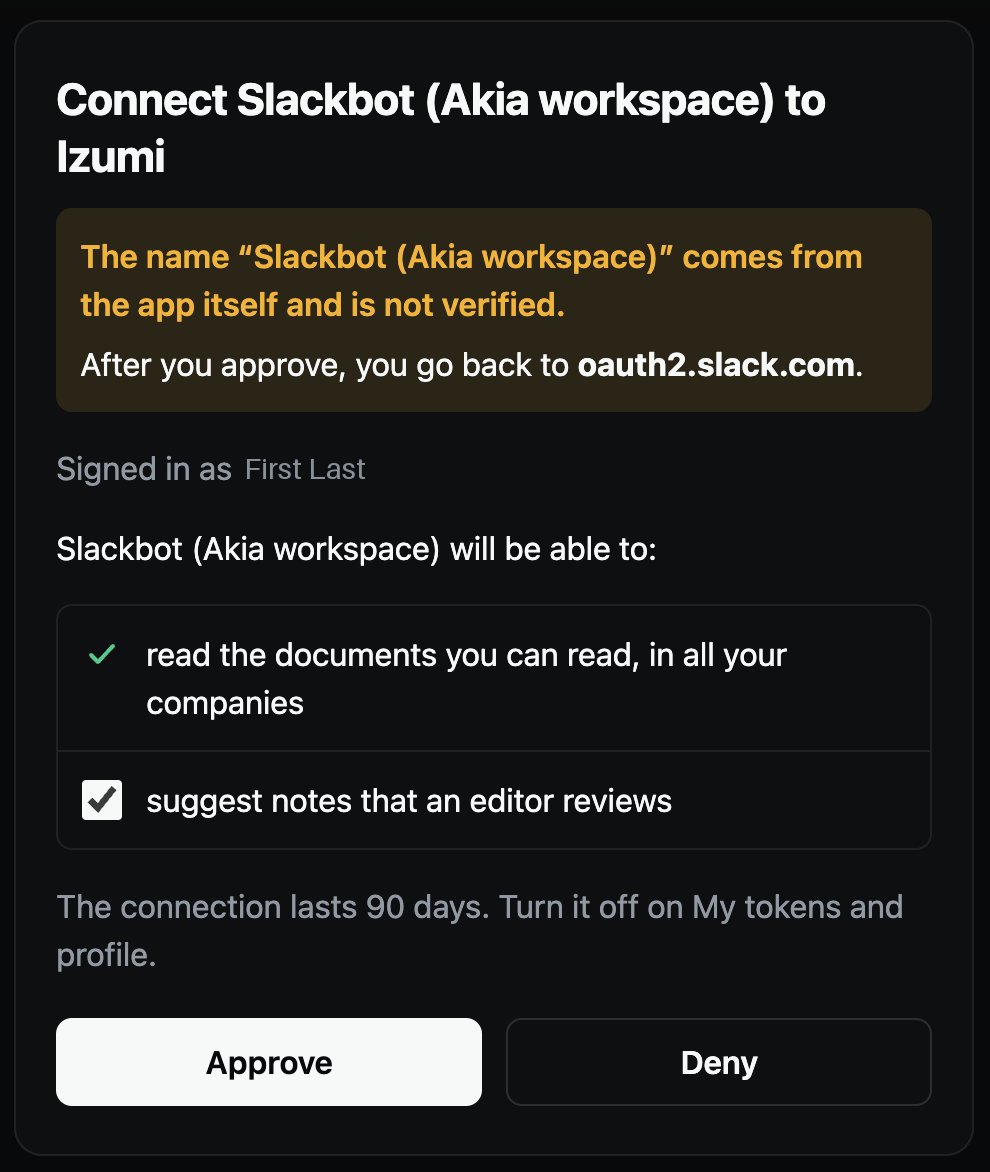
- A warning that the app’s name comes from the app itself and is not verified, and that after you approve you go back to
oauth2.slack.com. - read the documents you can read, in all your companies (always on) and suggest notes that an editor reviews (a tick, you can turn it off).
- The connection lasts 90 days.
- Click Approve.
6
Allow the tool
The tab closes, you return to Slack and the question continues. On the first tool call Slackbot asks for permission (Whoami, Search): Allow Once (this time only), Always Allow or Don’t Allow. To start, choose Allow Once.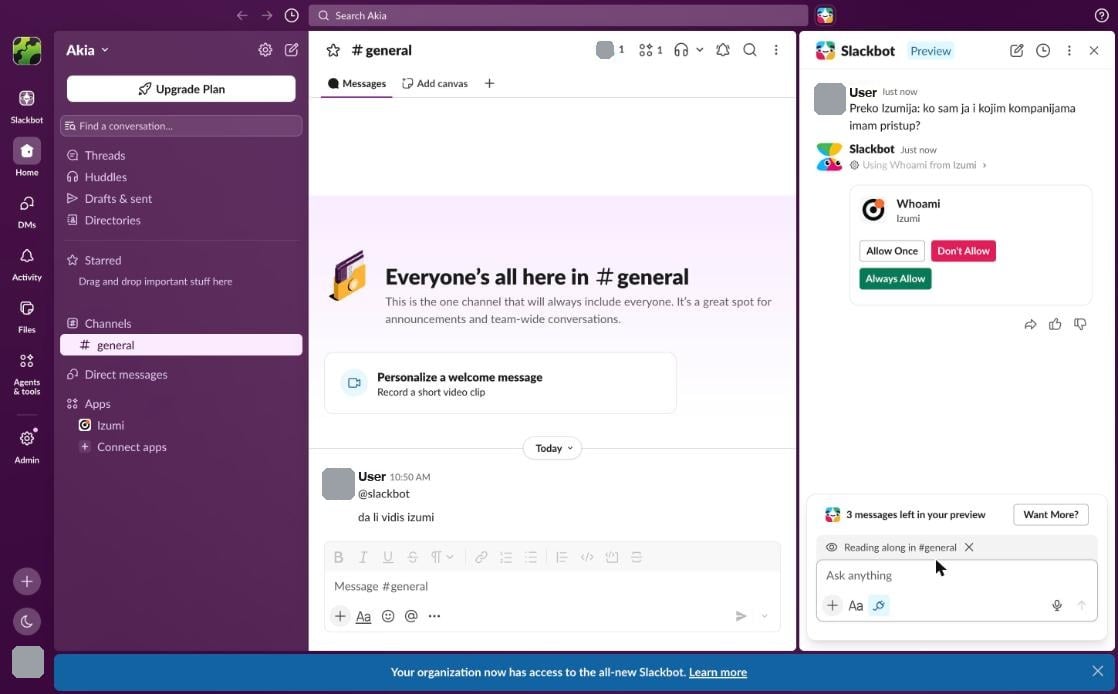
7
Read the answer
Slackbot answers with a link to the document in Izumi.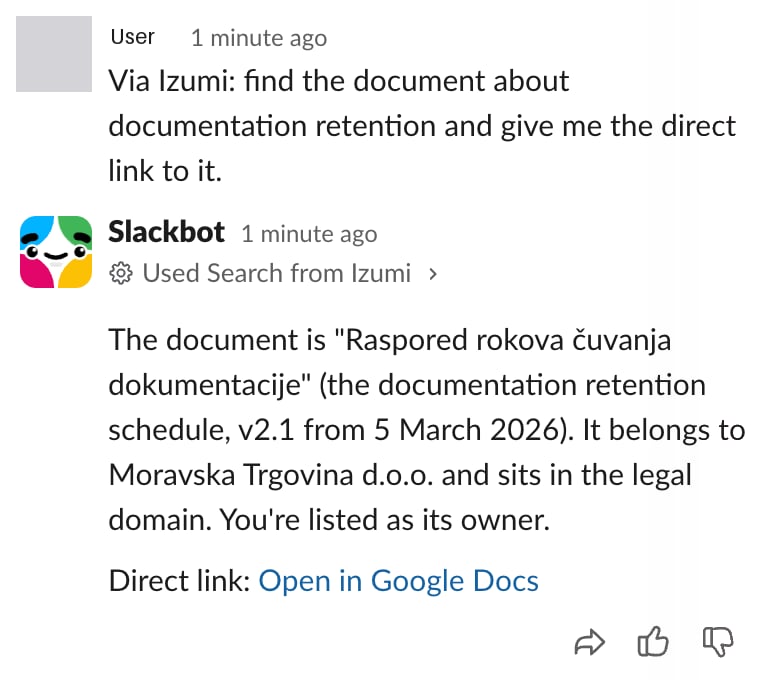
The Slackbot screenshots in step 6 show a question and an answer in Serbian, because the check ran with a Serbian question.
- “Via Izumi: find the document about (topic) and give me the link.”
- “Via Izumi: who in the company knows about (topic)?”
- “Via Izumi: propose a note in the domain (domain) with the title (title) and the text (text).”
A note proposal from Slackbot
Proposing was checked live (Izumi 0.5.2, 2026-11-19). The proposal appeared in the Review queue, with the client name from step 1, and an editor of the domain rejected it with a reason. For approving and rejecting, see the ChatGPT page, the section about the proposal in Izumi.See and revoke
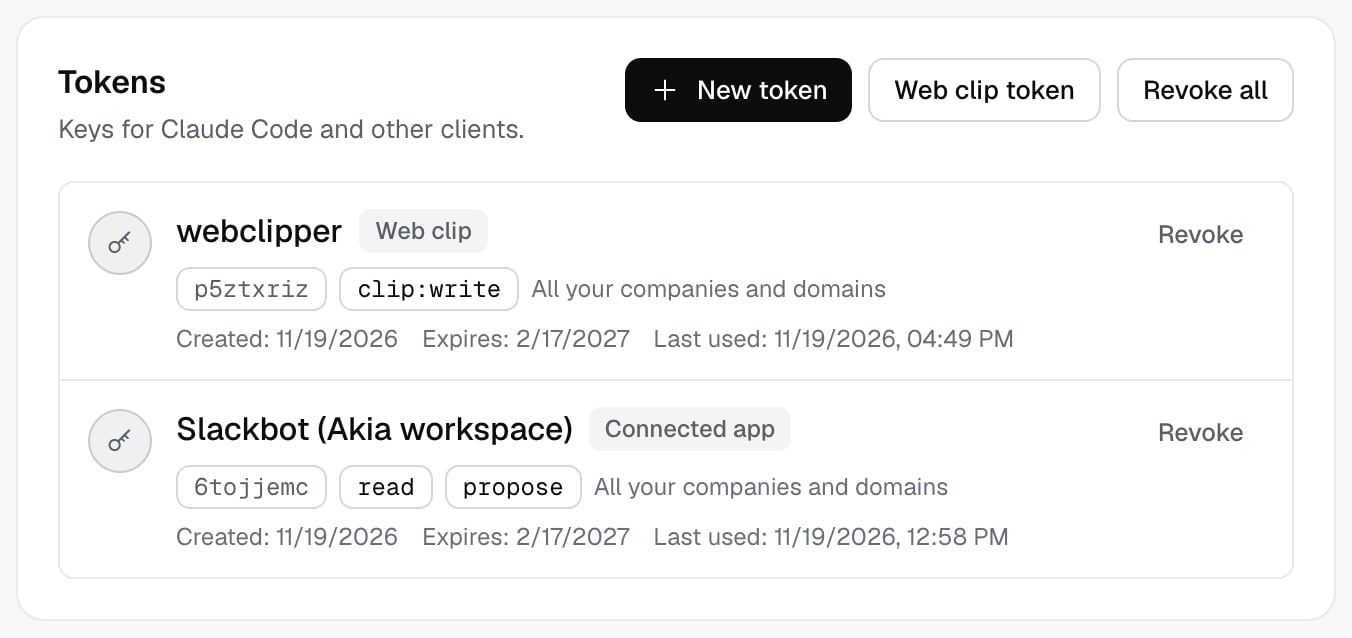
In Izumi open My tokens and profile, section Tokens. The connected app is a row marked Connected app with scopes (read, propose), expiry date and last use. Revoke ends the connection.