

What you get
- You ask Izumi from ChatGPT. ChatGPT calls Izumi tools and answers with a source and a link to the document.
- You see only what you may see in Izumi, in all your companies.
- Optional: ChatGPT can propose a note. The note goes to the Review queue, and an editor of the domain approves or rejects it.
- The connection lasts 90 days. You revoke it yourself on My tokens and profile.
Before you start
- An Izumi account, invited with the address you sign in with.
- A ChatGPT account. The plan Free was checked.
- The server address:
https://izumi.akiaconsulting.com/mcp. For a company with its own installation, it is the address of their Izumi with/mcpat the end.
Connect
ChatGPT renames its menus often. On the day of the check (2026-11-20) connectors are called Plugins. If your menu looks different, look for the entry that adds your own MCP server.
1
Add the MCP server
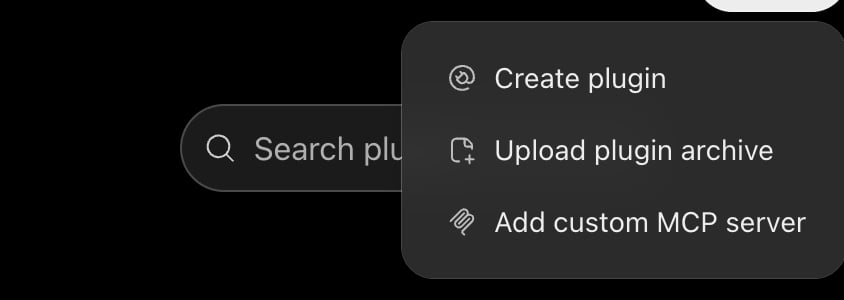
In the left menu of ChatGPT click Plugins. At the top right click Add, then Add custom MCP server. The same path leads through Settings, Plugins, Browse directory.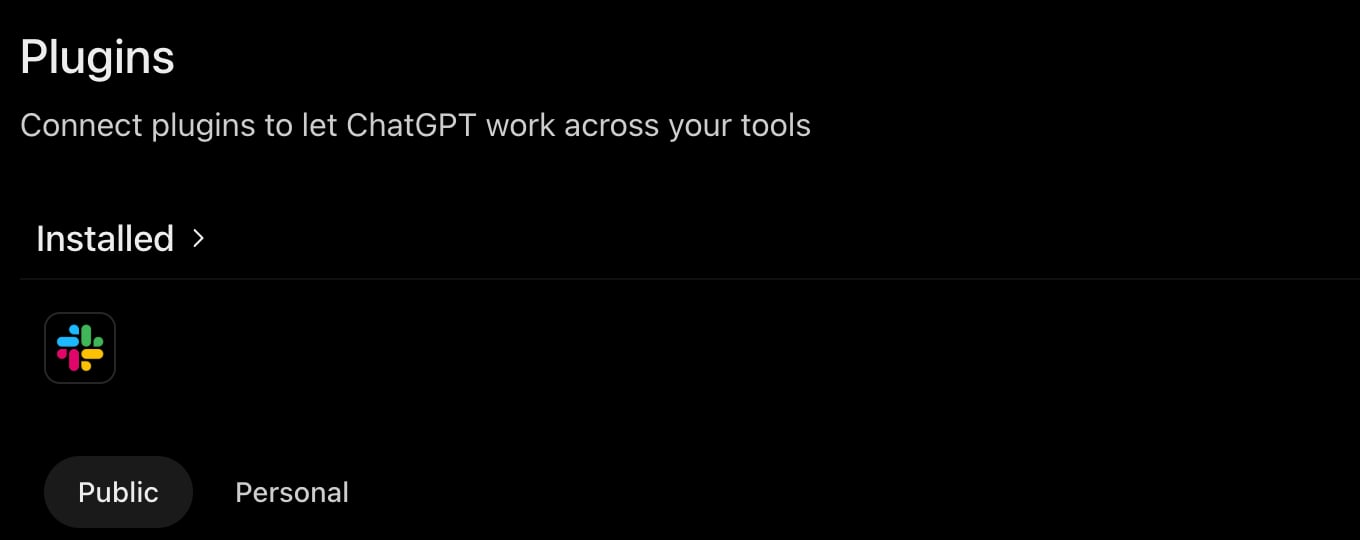
2
Fill in the form
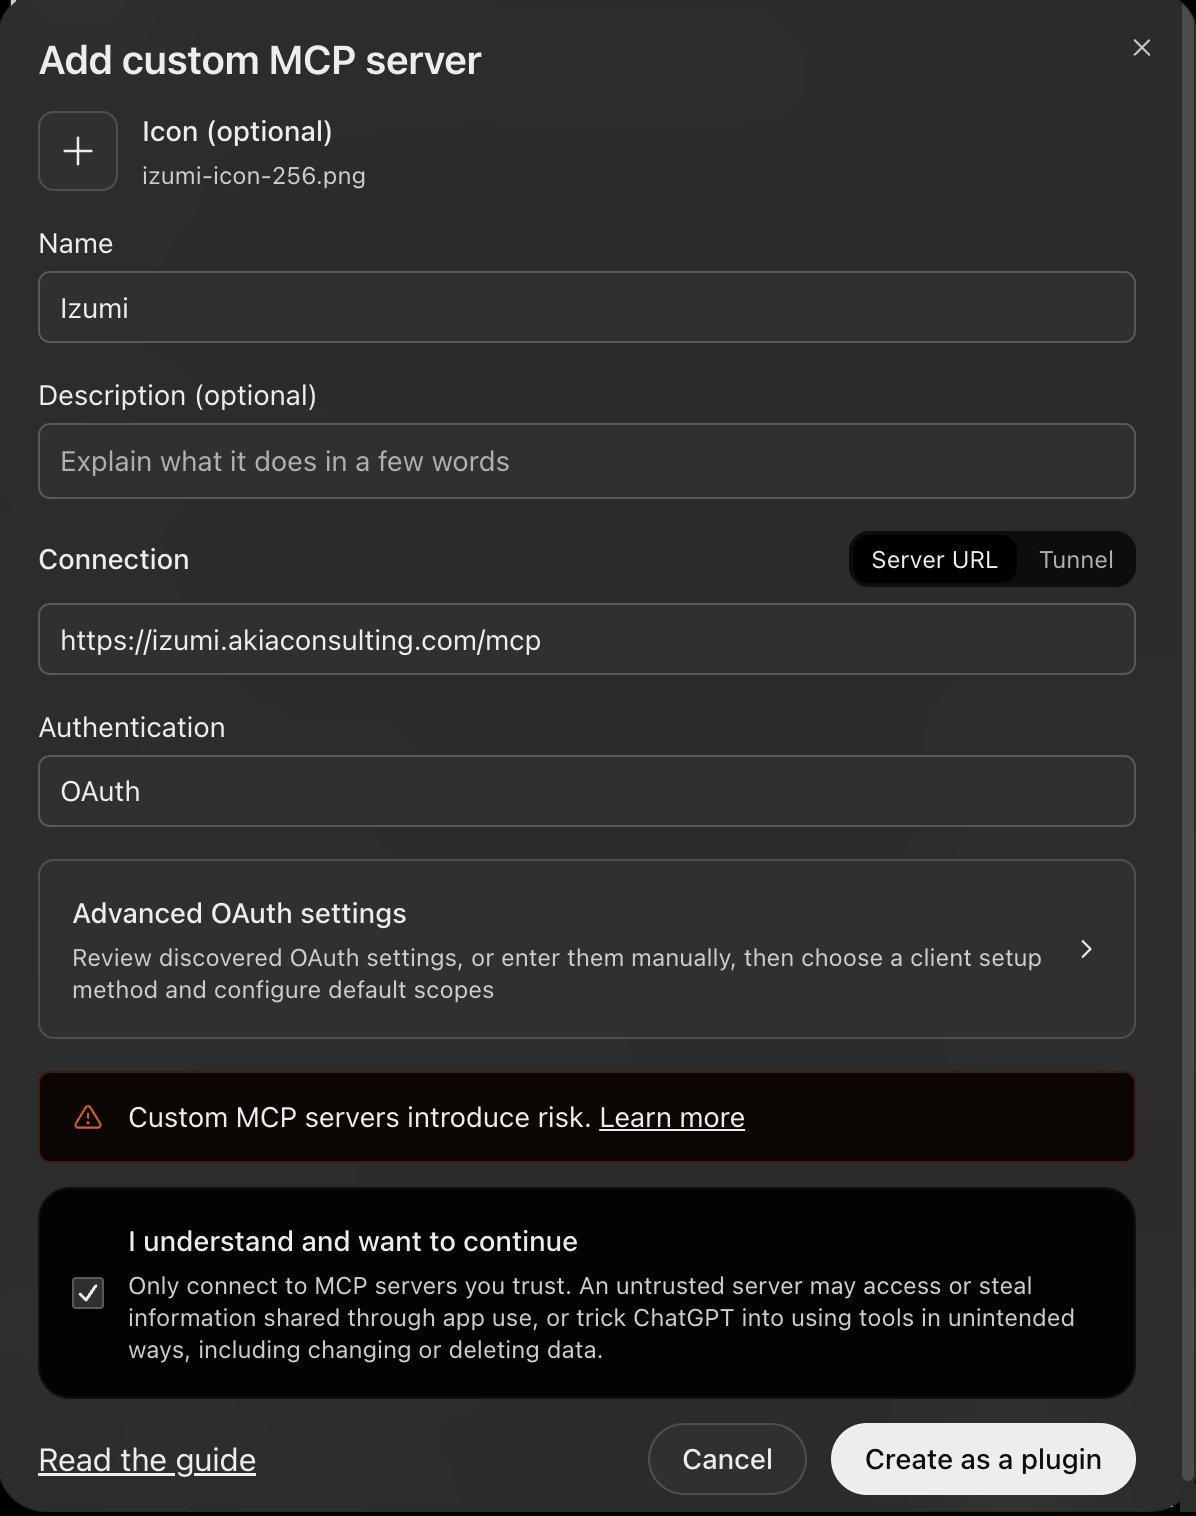
- Name:
Izumi. - Server URL:
https://izumi.akiaconsulting.com/mcp. - Authentication: OAuth. Do not open Advanced OAuth settings, the fields stay empty.
- Tick I understand and want to continue and click Create as a plugin.
3
Click Connect Izumi
ChatGPT creates the plugin and opens a window named Izumi. Click Connect Izumi.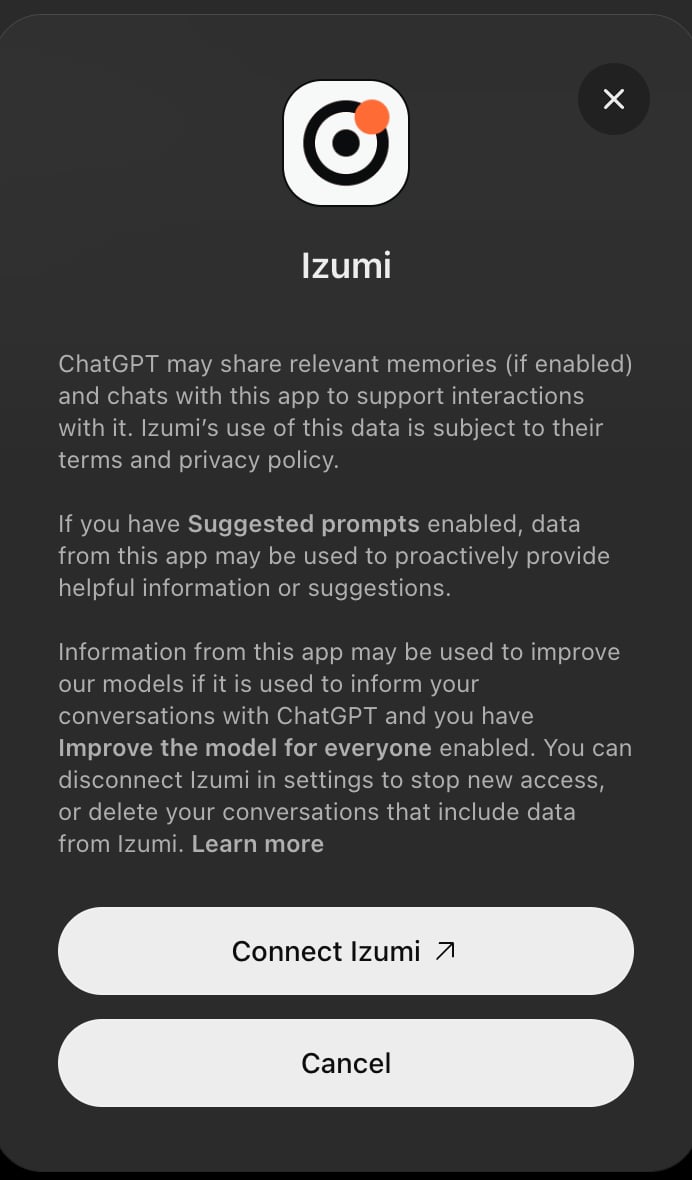
4
Approve the connection in Izumi
Izumi opens. If you are not signed in, sign in first. Then the page “Connect ChatGPT to Izumi” appears.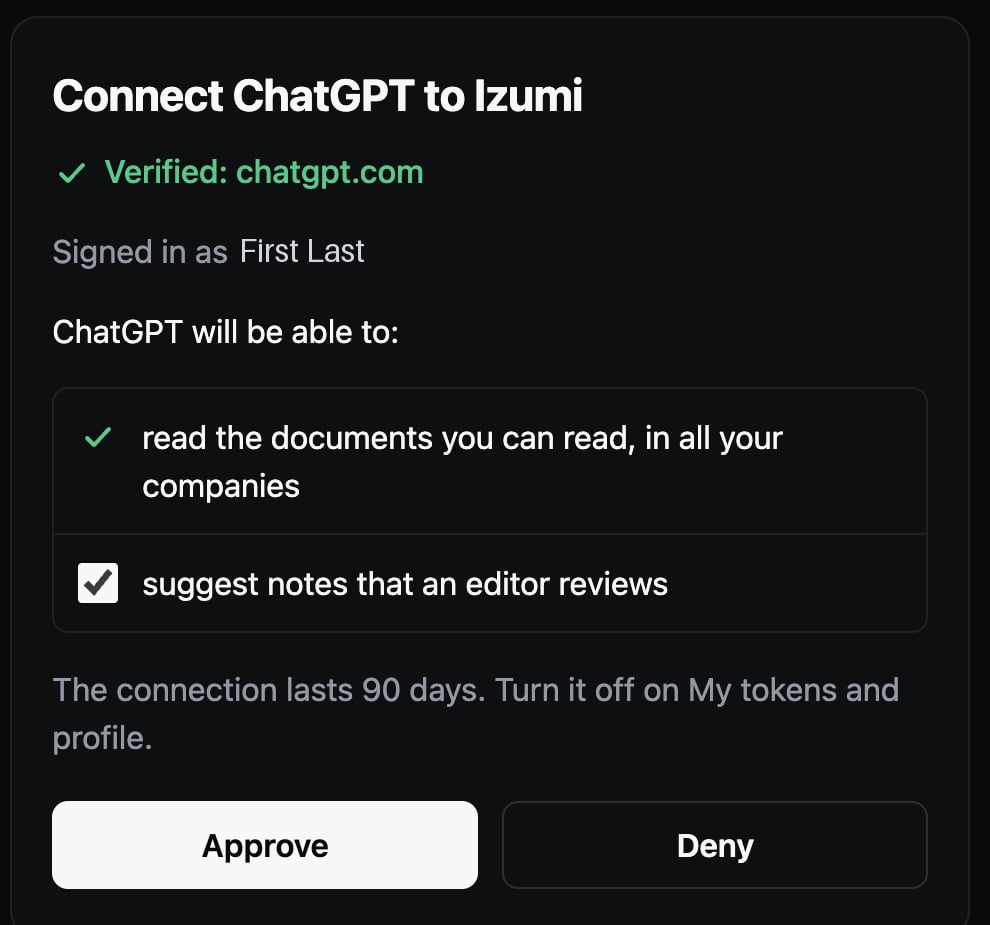
- Check that it says Verified: chatgpt.com. If it says anything else, do not approve.
- The first permission, read the documents you can read, in all your companies, is always on.
- The second permission, suggest notes that an editor reviews, is ticked by default. Untick it if ChatGPT should not propose notes.
- Click Approve.
5
Turn Izumi on in a chat
You return to ChatGPT and the plugin is in the Installed list. Open a new chat, click + in the message box and choose Izumi. This turns Izumi on for that chat.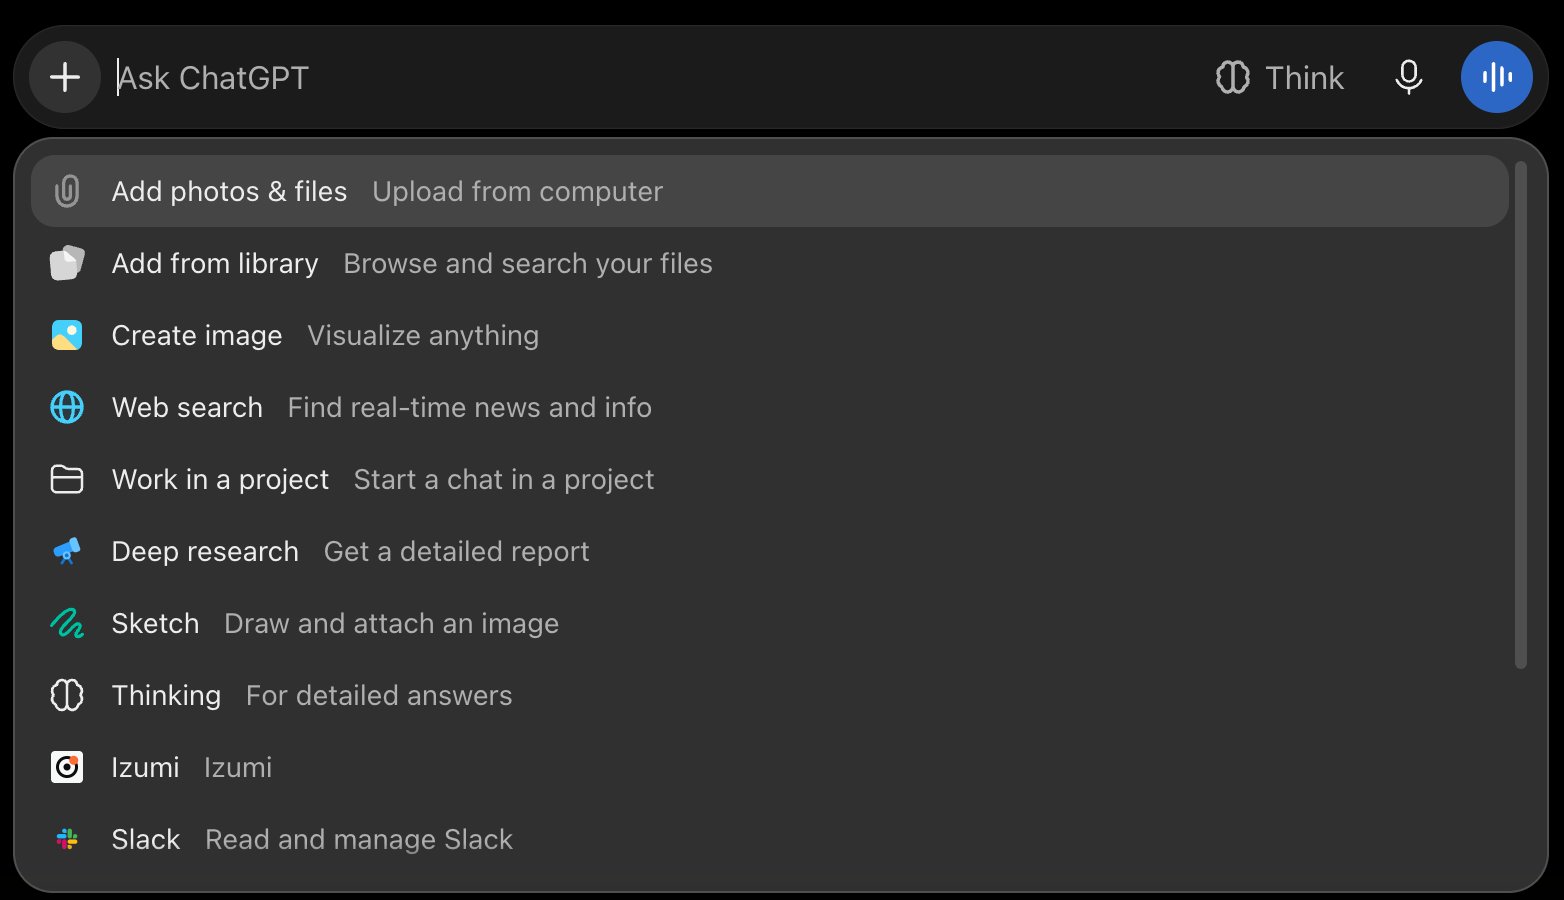
6
Check the connection and ask about your documents
Ask: “Call the Izumi tool whoami and tell me who I am and what I may do.” ChatGPT returns your name, the name of the connection (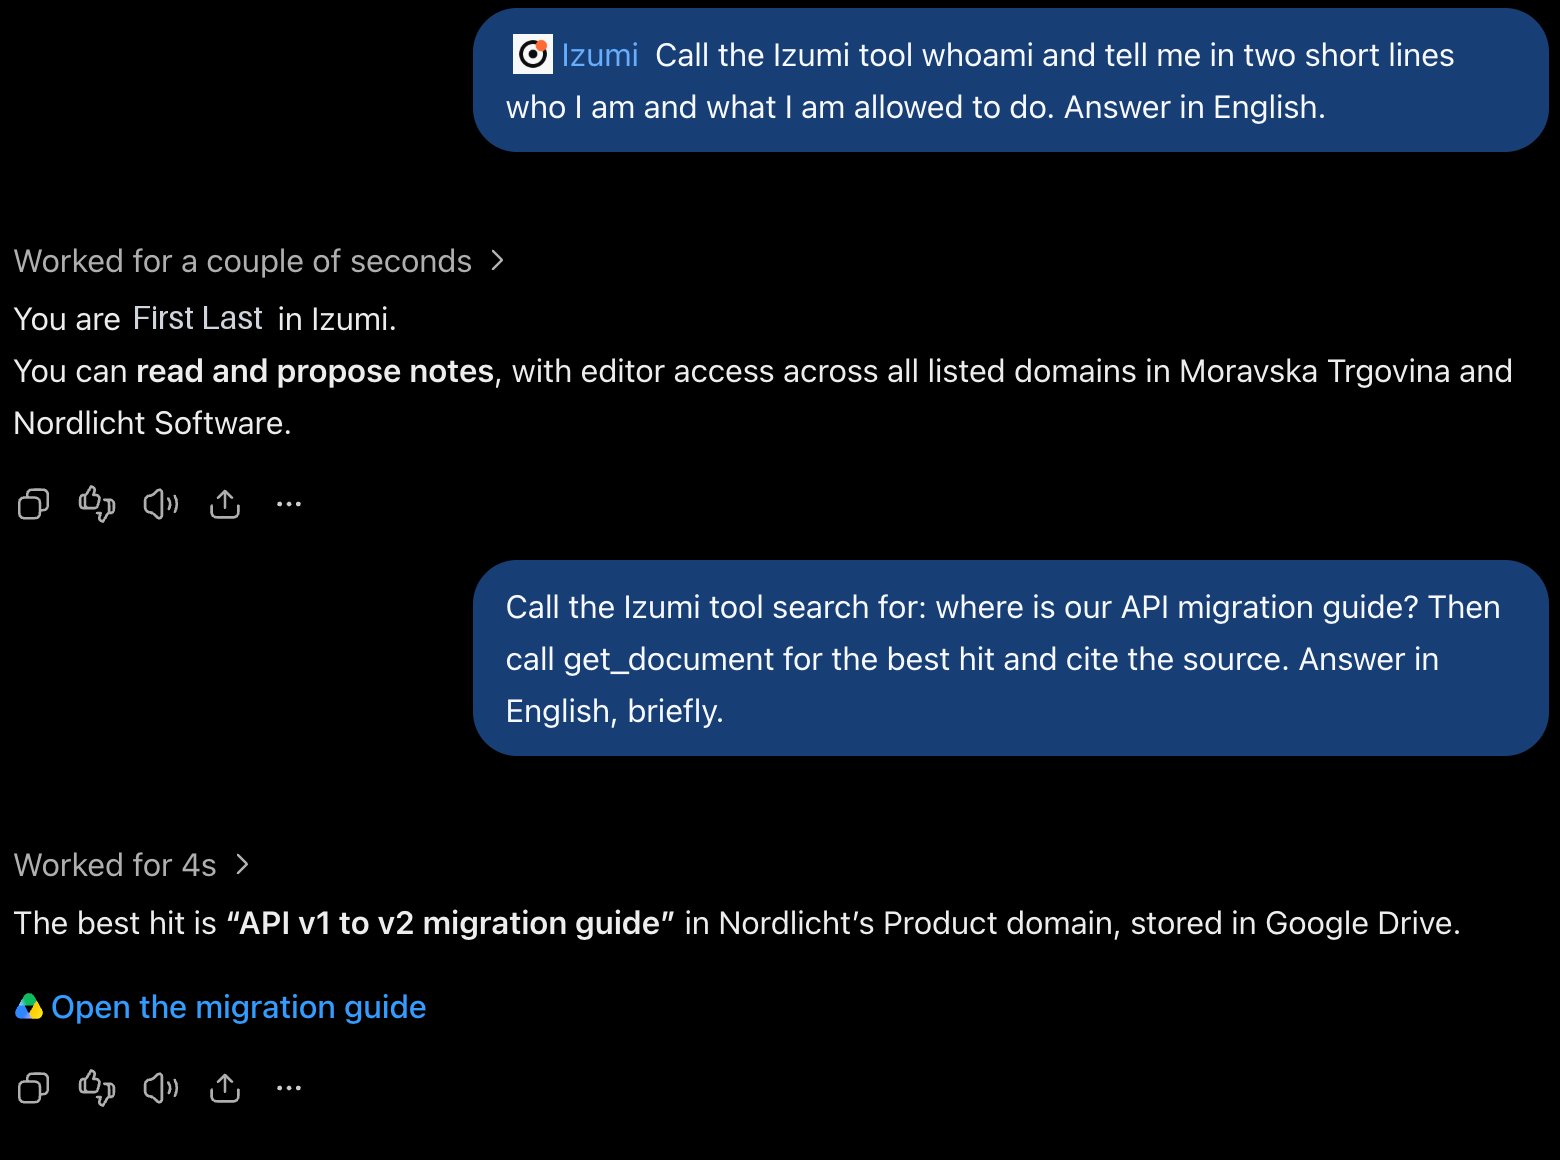
ChatGPT), the scopes (read, propose), the expiry (90 days from approval) and the domains where you are an editor.Then ask something from your documents, for example: “Call the Izumi tool search: where is the API migration guide? Then call get_document for the best hit and name the source.” ChatGPT calls search, then get_document, answers and gives a link to the source document.7
Propose a note (optional)
For example: “Call the Izumi tool who_knows for the topic …. Then call propose_note in the domain …”. The answer returns the proposal ID and the 30-day deadline.For tools that write, ChatGPT may ask “Allow ChatGPT to use Izumi?” with Always allow, Deny and Allow once. Choose as you see fit.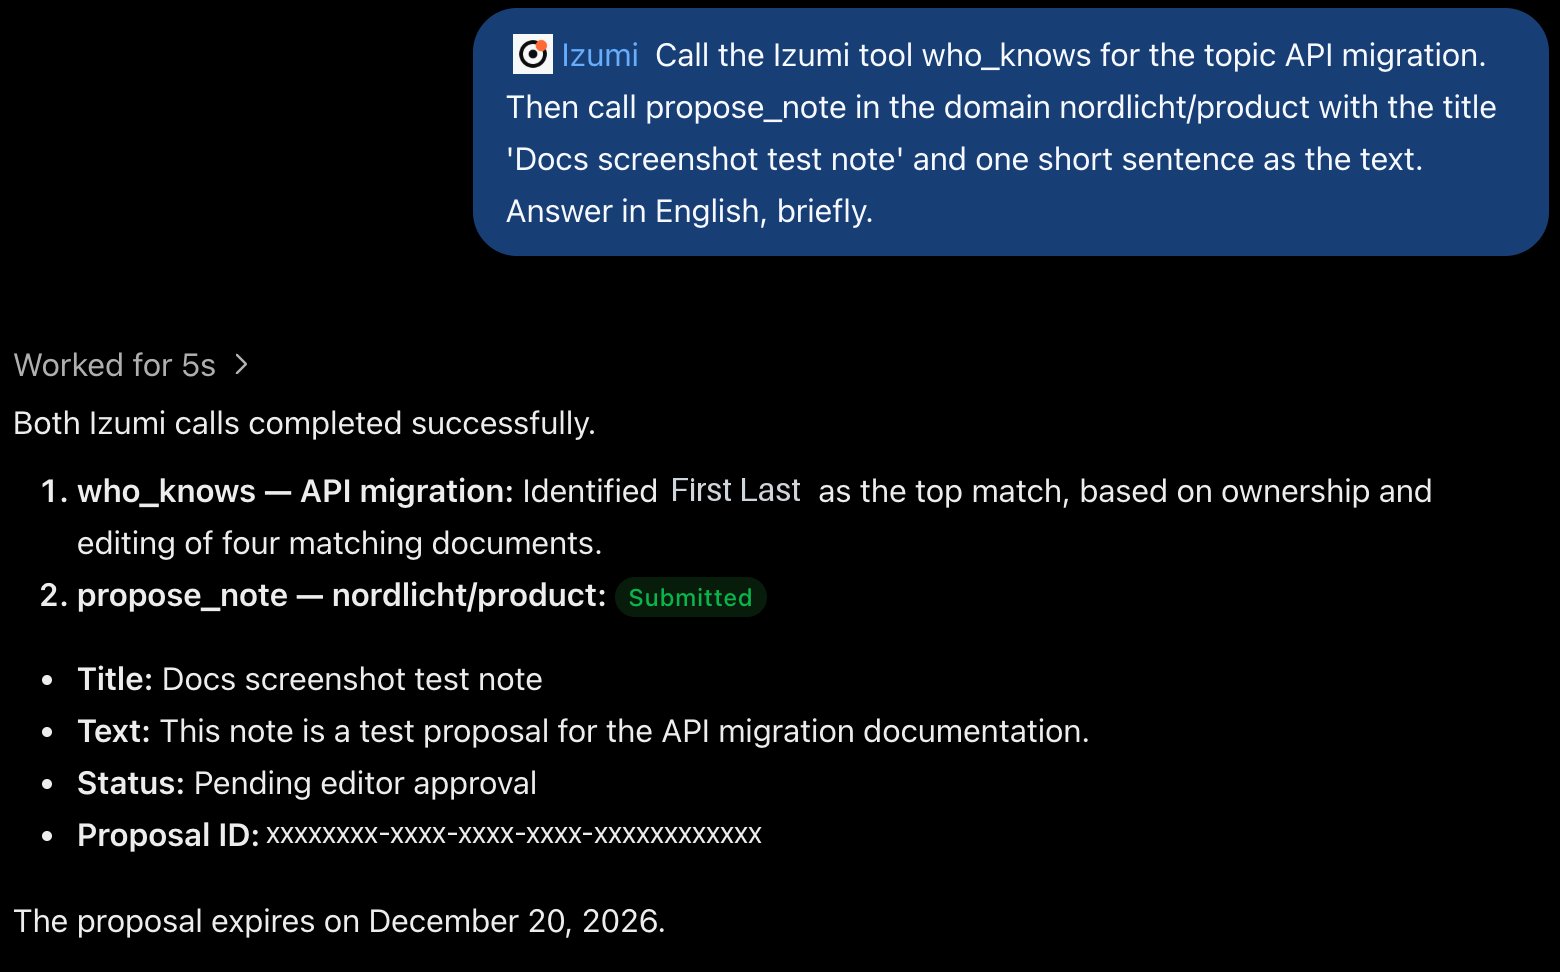
8
Check the proposal in Izumi
Open the Review queue, tab Pending. The row shows who proposed it and the client (ChatGPT). An editor of the domain chooses Approve or Reject. If the proposal is yours, you can withdraw it with Withdraw.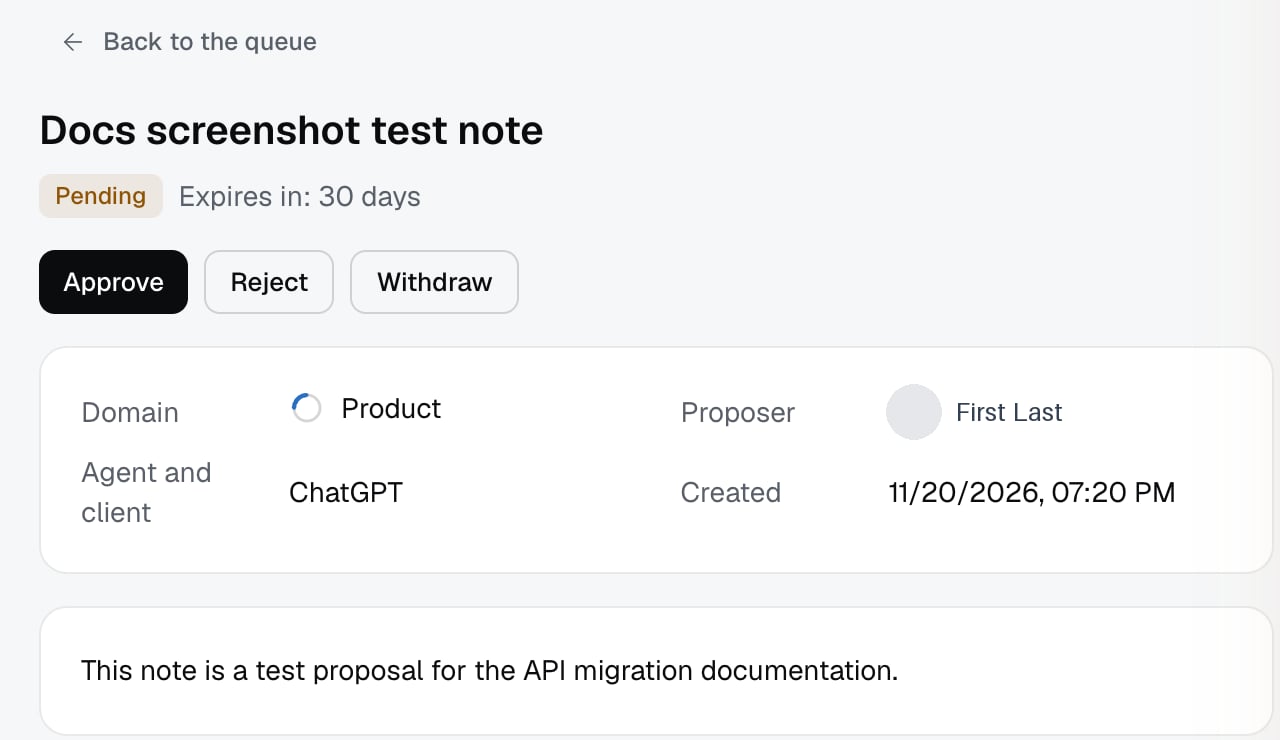
See and revoke the connection
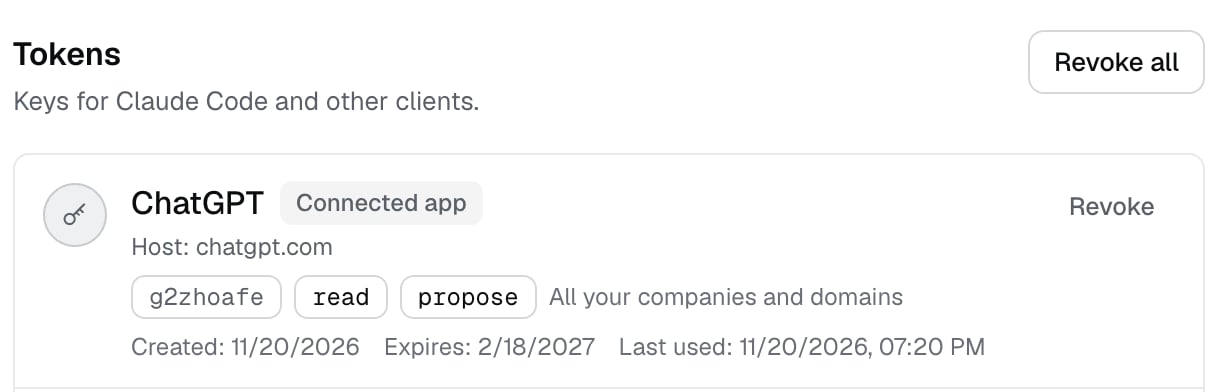
In Izumi open My tokens and profile. The connection is a row marked Connected app, with the name ChatGPT, the addresschatgpt.com, scopes, companies and dates. Click Revoke. The connection ends at once, without a confirmation.
whoami works with no other setup.
Remove the connector from ChatGPT
- Revoke the connection in Izumi (above).
- In ChatGPT: Plugins, Installed, open Izumi, the … menu (three dots), Delete plugin, and confirm (“Permanently delete Izumi and its connections? This can’t be undone”).
Limits
- The plan Free was checked. Everything works on it:
whoami,search,get_document,who_knowsandpropose_note. - Permission for tools that write: in one run ChatGPT called
propose_notewithout asking, in another it asked for Allow once. ChatGPT asks by its own risk judgment. Do not rely on either behavior. - A connection lasts 90 days from the last approval. After that ChatGPT asks for Reconnect.
- The rate limit is 60 calls per minute (
rate_limited). - The approval page shows the name you are signed in as in Izumi. If it is not your account, do not approve.
Troubleshooting
- Verified: chatgpt.com is missing, or the page says the client is not verified: the server cannot confirm the client’s identity. Approve only if the name and address match what you expect.
- “Reconnect Izumi” in the middle of a chat: the connection was revoked, expired or ended in Izumi. Click Reconnect, then Approve.
- There is no Izumi entry in the + menu: the plugin is off or deleted. Check Plugins, Installed.
forbidden_scopeonpropose_note: the connection was made without theproposescope. Revoke it and connect again with suggest notes that an editor reviews ticked. This error was checked live only in Claude Code, not in ChatGPT.searchdoes not find a document: ChatGPT sees only what you may see. Check that you can see the document in Documents.- After you delete the plugin in ChatGPT, check My tokens and profile and revoke what is left of the connection.